Star Monster Amigurumi — Free Crochet Pattern
Every round written out, with a photo for each piece — head, arms x, body. The full illustrated guide is in the YarnCro app.
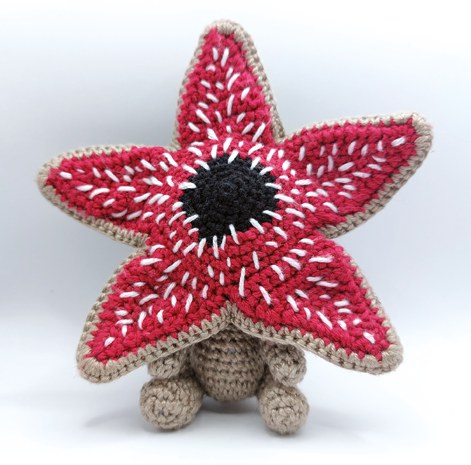
Every round below is written out exactly as the designer wrote it. Work through the pieces in order — the full illustrated guide, with a photo for each step, is in the YarnCro app.
Head
KAKI
Rnd 1. MR 5 (5)
Rnd 2. (inc) x5 (10)
Rnd 3. (1sc, inc) x5 (15)
Rnd 4. (2sc, inc) x5 (20)
Rnd 5. (3sc, inc) x5 (25)
Rnd 6. (4sc, inc) x5 (30)
Rnd 7. (5sc, inc) x5 (35)
Rnd 8. (6sc, inc) x5 (40)
Rnd 9 to 14. 40 sc (40) 6 rounds
Rnd 15. 8sc, ch1, turn
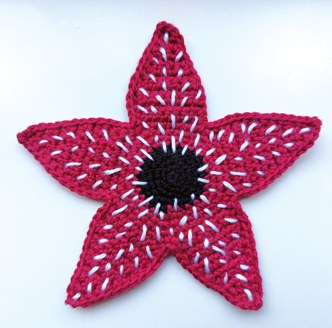
inc, 7sc, ch1, turn inc, 8sc, ch1, turn 12 rows dec, 8sc, ch1, turn dec, 7sc, ch1, turn dec, 6sc, ch1, turn 12 rows dec, 5sc, ch1, turn dec, 4sc, ch1, turn dec, 3sc, ch1, turn dec, 2sc, ch1, turn dec, 1sc, ch1, turn dec • FO, cut off yarn. • Repeat rnd 15 for each flap. • Start with new thread (slst, ch1) in next stitch in round 14. The first sc will be in the same stitch as the slst, ch1. • Work away tail in the next 3 stitches as you go. • When you reach the last flap, don’t cut the thread, ch1, turn and 12 sc down the flap. • When you reach the starting point of the flap, sc into the last and first flap-stitch of round 14. These stitches will now contain 2 sc’s, 1 for the flap, and 1 for the border. • Including this first stitch of rnd 14, you will have 13 stitches along the side of each flap. • NOTE! When you reach the next flap (the first flap you made in
rnd 14), it will have only 12 stitches on the right side, first sc on
the flap will be an inc to fix this. The next 4 flaps will need no increases here. • When you reach the top stitch (the point of the flaps), sc 1 extra. So total of 3 stitches on top (rightside st. / middle st / leftside st.) • Sc all around all remaining flaps. (135 st. total) Don’t cut thread!
• Using iron wire, make armature for flaps. You can use pliers to bend them into the star shape. • Try to make the armature as similar to the mouth shape as possible. • Twist the ends and wrap around with tape, to avoid pointy ends sticking out. To avoid breaking from bending, you can tape the bends in the wire. If it bends a lot, in time the wire might break from usage. • Now we start to sc all around the mouth, together with the head, and have the armature trapped inside. • Continue with the thread of the head. • Sandwich the armature between the head and the mouth. • 1. Push the hook through the next head stitch - underneath the armature - through the corresponding mouth stitch. • 2. Pull up yarn, now you have 2 loops on the hook. • 3. Pull up yarn over the armature and 4. Finish the stitch.
- 2. 3. 4.
• When reaching the 3 top stitches of the 5 points of the flaps: inc, 3inc, inc. You should have 7 top stitches in total. • Make sure the wire ends are inside the head. • Continue this all around. (155 st. total) • Make sure to stuff the head before closing the last flap. Don’t fill the flaps with fiberfill. • Finish off. Cut off yarn and work away thread.
Arms x
KAKI
Rnd 1. MR 8 (8)
Rnd 2 to 6. 8sc (8) 5 rounds
• FO, slst, work away yarn, don’t fill up yet!
Body
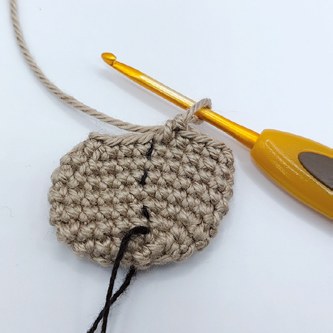
KAKI For the Body, we start with an oval shape. You will be going down one side of the chain and back around the other side.
Rnd 1. ch6, sc in 2nd ch. from the hook and work down the
chain, 3sc, 3inc, now work on the other side of the chain, 3sc, inc (12) Make 1 slst into the 1st st. of the next round. Treat this slst as the new end of the round, and place your running stitch marker after this slst. The next stitch you crochet is the 1st st of the new round.
Rnd 2. 3sc, (inc) x3, 3sc, (inc)x3 (18)
Rnd 3. 3sc, (1sc, inc)x3, 3sc, (1sc, inc)x3 (24)
Rnd 4 to 6. 24sc (24) 3 rounds
Rnd 7. 3sc, (1sc, dec)x3, 12sc (21)
Rnd 8. 3sc, (dec)x3, 12sc (18)
We’ll be attaching the arms in the next round. Start sc on the first arm.
Rnd 9. 8sc on 1st arm, continue with body, 2sc, (dec)x3, 2sc,
8sc on 2nd arm, continue with body, 3sc, dec, 3sc (30) NOTE! To avoid a gap in the armpit, you can either sew the hole shut. Or after you finish stitching 8sc around the arm, you can do an extra stitch sewing the first stitch of the arm together with the last used stitch of the body again. In the next round, this stitch is to be ignored.
Rnd 10. (3sc, dec)x6 (24)
Rnd 11. (2sc, dec)x6 (18)
Rnd 12. (1sc, dec)x6 (12)
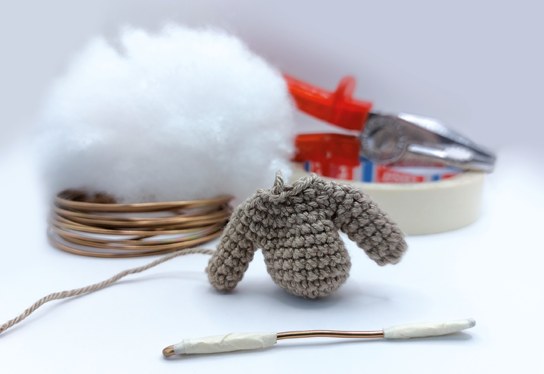
• Slst, FO, Leave long tail. • It may seem a little off just now, but when you start stuffing firmly, it’ll get into shape. The big bulge is it’s booty. • Add wire for the arms, bend the ends (to avoid poking out) and wrap the pointy ends with tape. Place it in the arms. Belly Booty
The rest of the pattern
Still to make: Legs x, Tail — plus assembly, the face, and finishing.
Those sections come with a photo for every step, which is hard to follow in writing alone. They are in the guide inside the app, free with a YarnCro account.